

Find Relevant Assets with Access Levels & Ranks
Jun 9, 2022
3 min

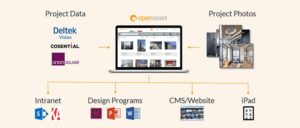
OpenAsset is built to house all of your files. Whether it’s project imagery, brand logos, or sales presentations, it makes sense to use OpenAsset as your all-in-one file repository (we discuss the full benefits of this in this blog). However, with all of your files stored on one platform, it can become confusing as to which images should be customer-facing vs internal-only, and which are considered your best assets vs those which are lower grade.
Two of OpenAsset’s file search features – Access Levels and Ranks – can help you get these answers in an instant. Access Levels are user-facing tags that denote whether a file is suitable for use. These save time by reducing the back and forth between marketing, brand, and design teams over what is approved and what isn’t. Ranks on the other hand are a way to more fluidly rank (unsurprisingly!) images, generally based on the quality of the image. This blog will discuss Access Levels and Ranks in more detail, and how they can be used to guide users to relevant files.
Guiding Users via Access Levels
As mentioned above, Access Levels are tags that tell users whether a file is approved for use. These tags are viewable on the File Info tab, or they can be toggled to appear under your file thumbnails, via your search page view settings, like so:

By default, these Access Levels are set to the following naming convention: ‘Restricted use’, ‘Internal use’, and ‘External Use’. However, these names can be edited at any time (with the required Admin privileges) via Text Rewrites. For instance, you may choose to change these to ‘Internal use’, ‘Marketing use (non-commercial)’, and ‘Marketing Fully Approved’. This might be useful if you have some images that you want to use in sales presentations or internal marketing documents, but they’re not approved for commercial campaigns. Alternatively, you might want to keep the same convention but simply change the naming, for example changing ‘Restricted use’ to ‘Do not Use!’. As with most OpenAsset features, Access Levels are designed to be flexible for your needs and therefore there is no right or wrong setup.
Combining Access Levels with Permissions
As we’ve outlined above, Access Levels can act as a guide to let users know which assets are approved for use, and which ones aren’t. However, by combining Access Levels with Permissions you can go one step further and actually steer users to only view or act upon specific files based on that file’s Access Level.
Via the Category Permissions page, an admin can assign User Groups to be able to View, Upload, Edit, or Delete assets, based on both the File Category and Access Level. An admin can toggle these specific permissions as seen in the screenshot below.

There are a few ways an admin might utilize this to ensure their team is only accessing the files they need. A few examples of different Groups and the Access Levels they might have are highlighted below:
- Marketing team – access across all categories and access levels to give them the freedom to Upload, Edit, and View all files.
- Bid team – access to View only external use Project imagery, so that the Project assets they use in bid documents are fully approved.
- Graphic Design team – ability to Upload marketing materials across all access levels. Ability to View only external use Project imagery, to ensure only approved images are used in new designs.
- Contractors / Freelancers – no access to restricted/internal use marketing materials, as these may contain confidential information.
While the above is not a definitive list of how Access Levels should be used, it should provide some inspiration as to what might work for your team.
Guiding Users via Ranks
As mentioned earlier, Ranks are designed to be more fluid than Access Levels and are used to order files based on certain criteria – most commonly image quality. This can be helpful when you need to quickly select the best quality image from a project or search.
By default, your Ranks are set as a simple numbering system, from 1 to 5. But, just like Access Levels, these can be renamed to work for your specific use-cases. For example, you might change 1 to “1 – Website Quality”, and 5 to “5 – Internal Docs Only”. This can give more context to your assets and ensure users understand the intention of the ranks. Details around renaming ranks are listed, here.
Another factor that differentiates Ranks from Access Levels is that Ranks can be used to automate the creation of Project and Resume documents. When creating your Project/Resume templates, you might want to only pull in images ranked ‘1’ to ensure the very best images are included. Alternatively, you may want to pull images in a hierarchy – from ranks 1 to 3, with number 1 in the most prominent position. No matter what system you use, you can always change your mind by switching images in and out via the InDesign drag and drop feature.
Searching via Access Levels and Ranks
Access Levels and Ranks wouldn’t be particularly useful if there was no way to quickly surface the approved/best quality files. Using File sorts and Advanced search are two ways you can achieve this.
The most common workflow to surface an image with the desired Access Level or Rank is by simply sorting your search results. This is particularly useful for Ranks where you might be more flexible on the images you use. For example, you may prefer Rank 1 images to show first, but you don’t want to discount images with Ranks 2, 3, etc if needed.
If you’re an Admin user, one practice you might consider is adjusting a Group’s default search preferences. For instance, you may set the default search interface to sort by Access Level first and Rank second. This will mean approved files will surface first, and within those files, the highest-ranking will be most prominent.
Users can also search for a specific Access Level or Rank via the ‘Search By’ dropdown. For Access Levels, you would simply select the Access Level you would like, whereas for Ranks you might choose to search for an exact Rank (eg. Equals 1) or across multiple (eg. Rank < 3). Unlike sorting, this completely filters out any unwanted assets.
Getting Started
Not every file in your OpenAsset platform needs to be picture-perfect and approved for customer use. In fact, if they’re not, we see that as a sign of a great system – you’re getting the full use out of OpenAsset by using it to store and manage files of all types. However, having a quick view of which assets are approved is essential. Not only do Access Levels avoid unnecessary back and forth between teams, but they can also be combined with permissions to proactively stop users from accidentally using an unapproved file. Meanwhile, Ranks can be used to quickly guide users to your firm’s very best files.
To learn more about Access Levels and Ranks you can reach out to your dedicated Customer Success Manager, or you can contact support, here.