4 Phases of DAM Onboarding
Jul 14, 2016

Congratulations on selecting a DAM system! DAM makes it easy to upload, tag, and find digital image assets. Now it’s time to get your system up and running. We lead our clients through a 4 step onboarding process to get their system set up as quickly and efficiently as possible. Through the onboarding process you’ll add content, configure settings, set up integrations, and establish document workflows.
Upload Content
Getting content into your DAM is the most important part of the DAM project. Most vendors offer a Data Migration service to help you get content uploaded and tagged quickly. When adding content to the DAM, the best advice we give our clients is to prioritize. Upload your most important, and frequently used assets first.
Configure
Now that you’ve got content uploaded into your DAM, it’s time to configure the DAM metadata, system settings, and security.
Integrate
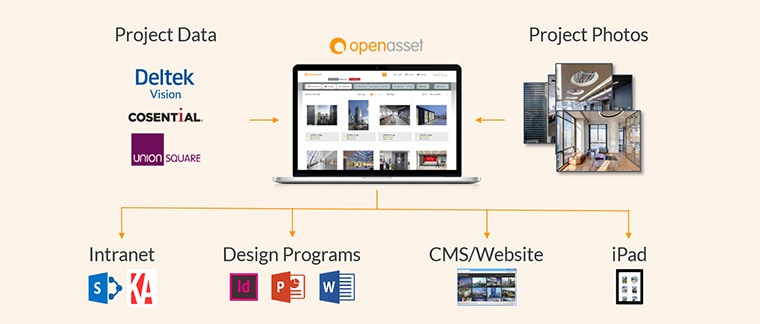
Automatically pull metadata into the DAM from your CRM or other project-based systems to save time and error in data entry. Integrations also allow the DAM to push content directly to your intranet or website.
Create Documents
One of the greatest benefits of DAM is the improvement to document creation workflows. A good DAM system will interface with the design programs used by marketers and designers on a daily basis. Consider developing templates for InDesign and PowerPoint so that users can create branded documents on-demand.
Getting Started with DAM
Setting up your DAM system is no small feat. Each phase of onboarding requires careful planning and input from your vendor and end users.


