Crafting beautiful, client-facing presentations can be a never-ending challenge. While you need to create these decks at speed due to the ongoing cycle of new opportunities, you also need to tailor each presentation to ensure they include the project imagery and information relevant to each prospective client. Creating a unique deck for each new meeting can be an incredibly time- and resource-intensive process. While you might think that’s just the nature of pitching for new business, there is an easier way.
Through OpenAsset’s visual interface and in-built presentation tools, our platform can be the perfect place to showcase your firm’s projects, with virtually no legwork needed. With your project images, information, and employees all linked on one system, you can quickly find the projects that matter to your prospect, and present them seamlessly. And even when you do require a branded PowerPoint deck, our tools can help in this process too. This blog covers some best practice tips on how to get more out of your OpenAsset platform by utilizing it as a presentation tool.
Slideshow view
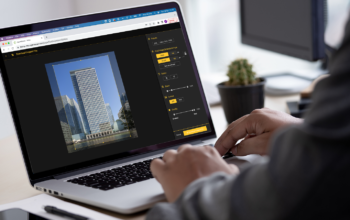
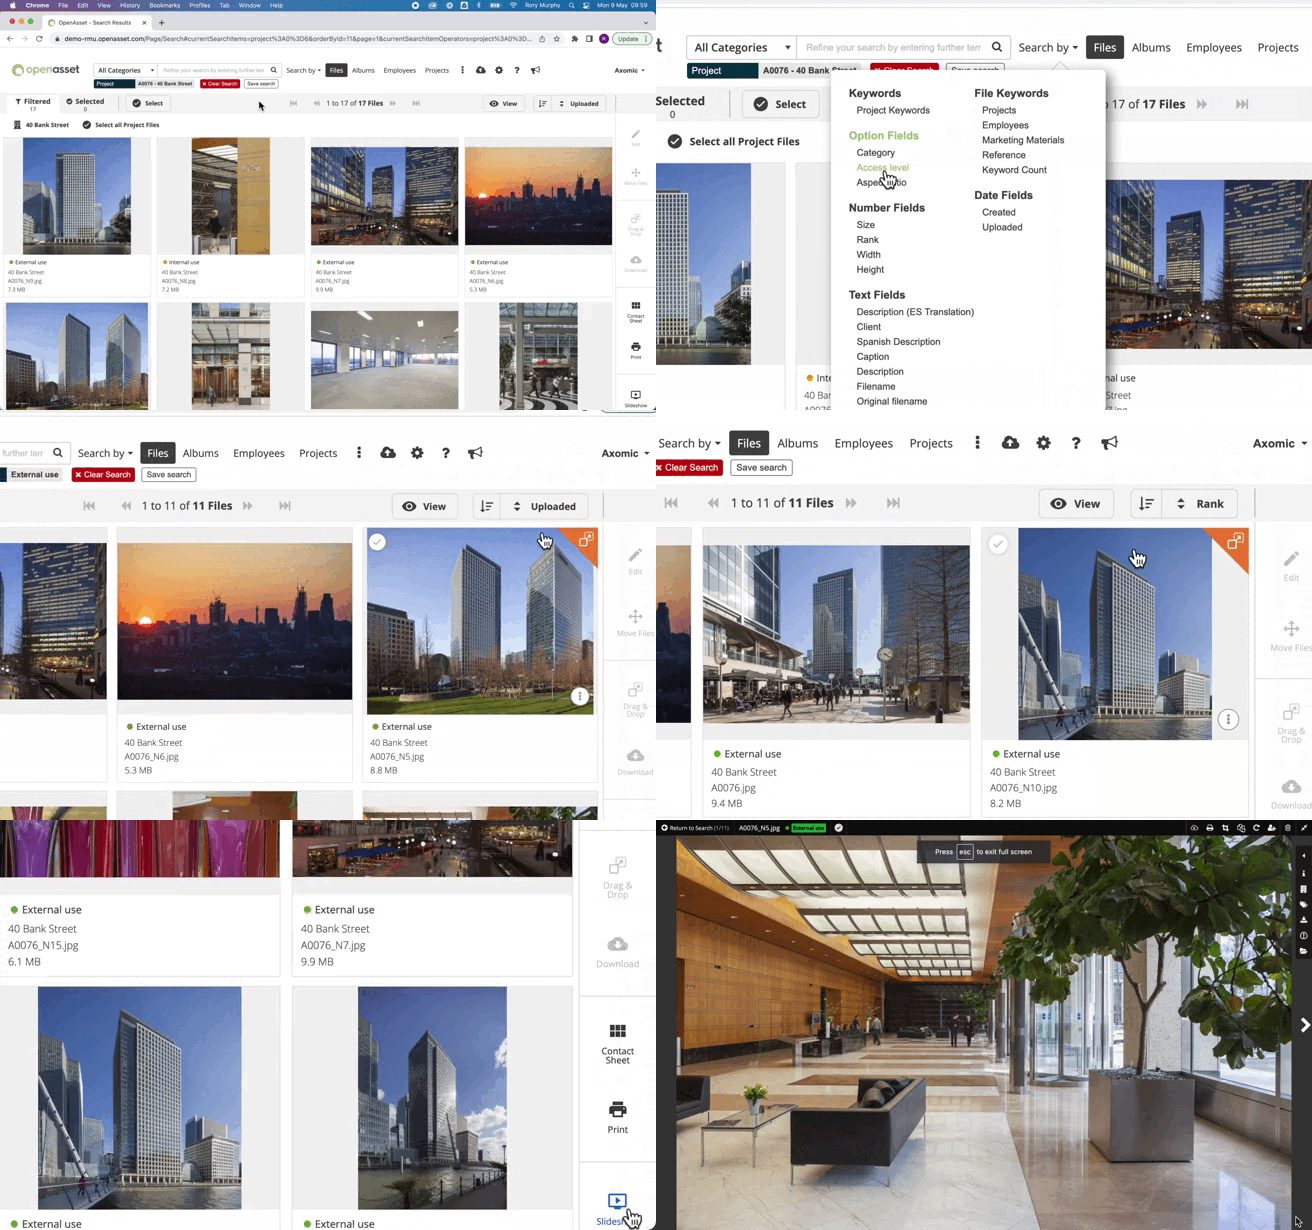
With OpenAsset’s Slideshow functionality, there is no need to export or reformat your images – you can present your assets directly on your platform. This mode offers a full-screen view where you can cycle between your images. Not only is this the easiest way of showcasing your assets, but it also allows you to quickly reference any connected metadata. While the process of starting a Slideshow is very simple, one challenge you may encounter is how to best collate the images you want to present. There are a number of ways you may tackle this, but below are some best practice tips.
Albums
One great way to organize your images for a Slideshow is to create a dedicated album. This is likely the best option to showcase your images if you have time to prepare your images, or you know you have a suitable album already created. One of the benefits of an album versus the next two options is the ability to manually reorder the images in any way you like. This gives the option to put the most impactful images first.
Ranks
Another way to collate your best images for a Slideshow is by using Ranks. Ranks can be assigned to images to give them a rating, typically from 1 to 5. The usage of Ranks differs from firm to firm, but typically they assign a priority to your images (eg. 1 = best photography, 5 = draft images). You might use Ranks in Slideshows to filter your images (eg, only Ranks 1 and 2 are visible), or to sort your images, so that Rank 1 images show first, followed by Rank 2, 3, etc.
Access Levels
Like Ranks, Access Levels can mean different things to different firms, but generally, they are used to classify assets into distinct groups. For example, your system admin might catalog images into three buckets: ‘External Use’, ‘Internal Use’, and ‘Restricted Use’. Utilizing these existing classifications can be a quick way to pull assets together to highlight your external use images and exclude restricted images. Like Ranks, you might choose to use Access Levels to either filter or sort your imagery. Alternatively, you may even choose to combine the two – for example, you might filter on ‘External Use’ images, and then sort by Rank.
Presenting Project Overviews
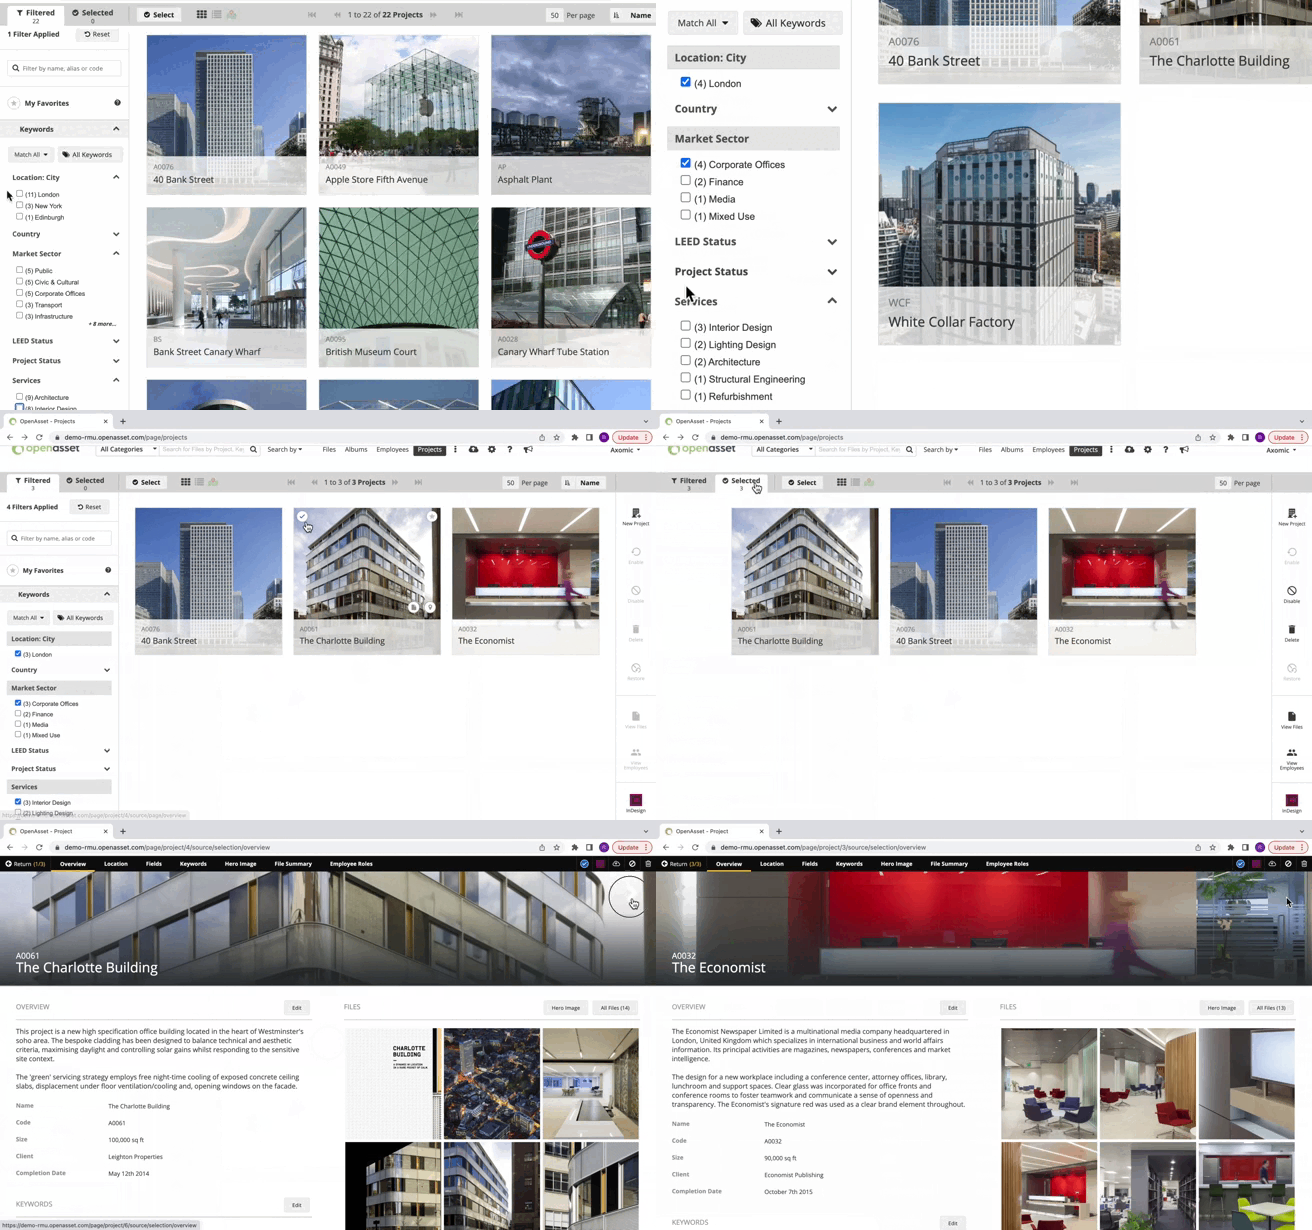
When you need to highlight key information related to your projects, your Project Overview pages can be a great tool. These pages provide a visually engaging way of presenting the most important data around your project, alongside thumbnails of your project imagery. These can be particularly effective when you want to showcase a few projects which are closely aligned to your prospective client’s needs. We can illustrate this with an example:
Let’s say you’re pitching for a client who is looking for a firm that can help with the Interior Design of their new London office. You’ve presented your firm’s general experiences and capabilities in your branded deck, but now you want to highlight some work that is particularly relevant to the client’s needs. Navigating to your OpenAsset system, you can quickly filter to your projects based in London, where you performed Interior Design services, and where the building type was an Office. You would then Select these projects in the order that you would like to view them. For example, in the below recording, we might know that The Charlotte Building shares many of the same qualities with the project we’re pitching for, so we’ll Select that first. Finally, we can view and present each project, before using the arrows to seamlessly toggle to the next.
Using Project Overviews guarantees you’re using the most up-to-date information, which isn’t necessarily true of using an existing slide deck already saved on your PC. Also, as you can see from the screen recording below, this process is super quick which is perfect for when you’re dragged into a last-minute pitch.
You’ll also likely want to provide some printed resources for the client to learn more about these projects. This is where project templates are invaluable.
Presenting your Map View
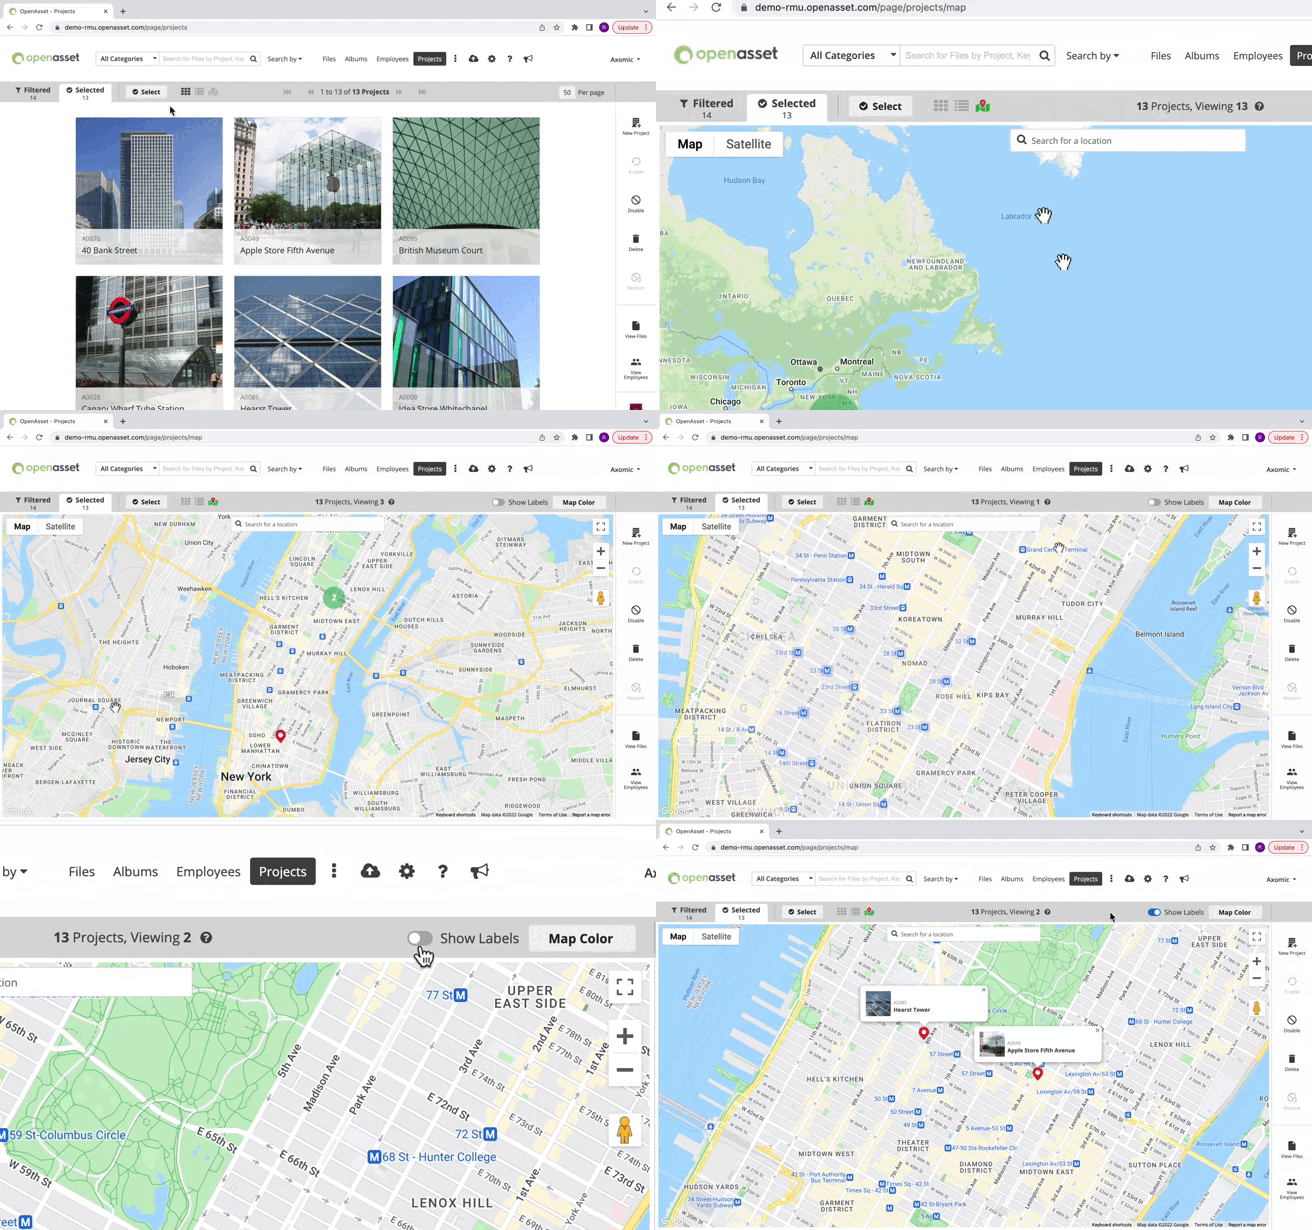
While your Project Overview pages highlight your individual project’s location, sometimes you might want to showcase the locations of a range of projects, or even your entire portfolio. This can easily be achieved via the Map View.
Perhaps your prospective client has offices in London and New York and wants to partner with a firm that has prior experience in these locations. Instead of just speaking to this, you can present it in a more visual way by mapping out your portfolio of projects on-screen. You can then narrow down to certain areas, toggle project labels, and even change the map color if preferred. This can give your prospective client a much clearer picture of where you operate, and your experience with different projects in different cities or countries.
Exporting to Branded PowerPoint Templates
The first three workflows detailed in this blog involve using the OpenAsset platform itself to present your work, but you can also use our PowerPoint tool to easily automate the creation of PowerPoint slides. With OpenAsset’s self-serve template creator, you can very quickly create a branded deck and then generate it with images from a specific selection or album. We discussed the best ways to collate your images in the Slideshow section of this blog, and these same principles can be applied here. One benefit of using the PowerPoint template creator versus Slideshows within OpenAsset is if you need to incorporate the slides into a wider deck.
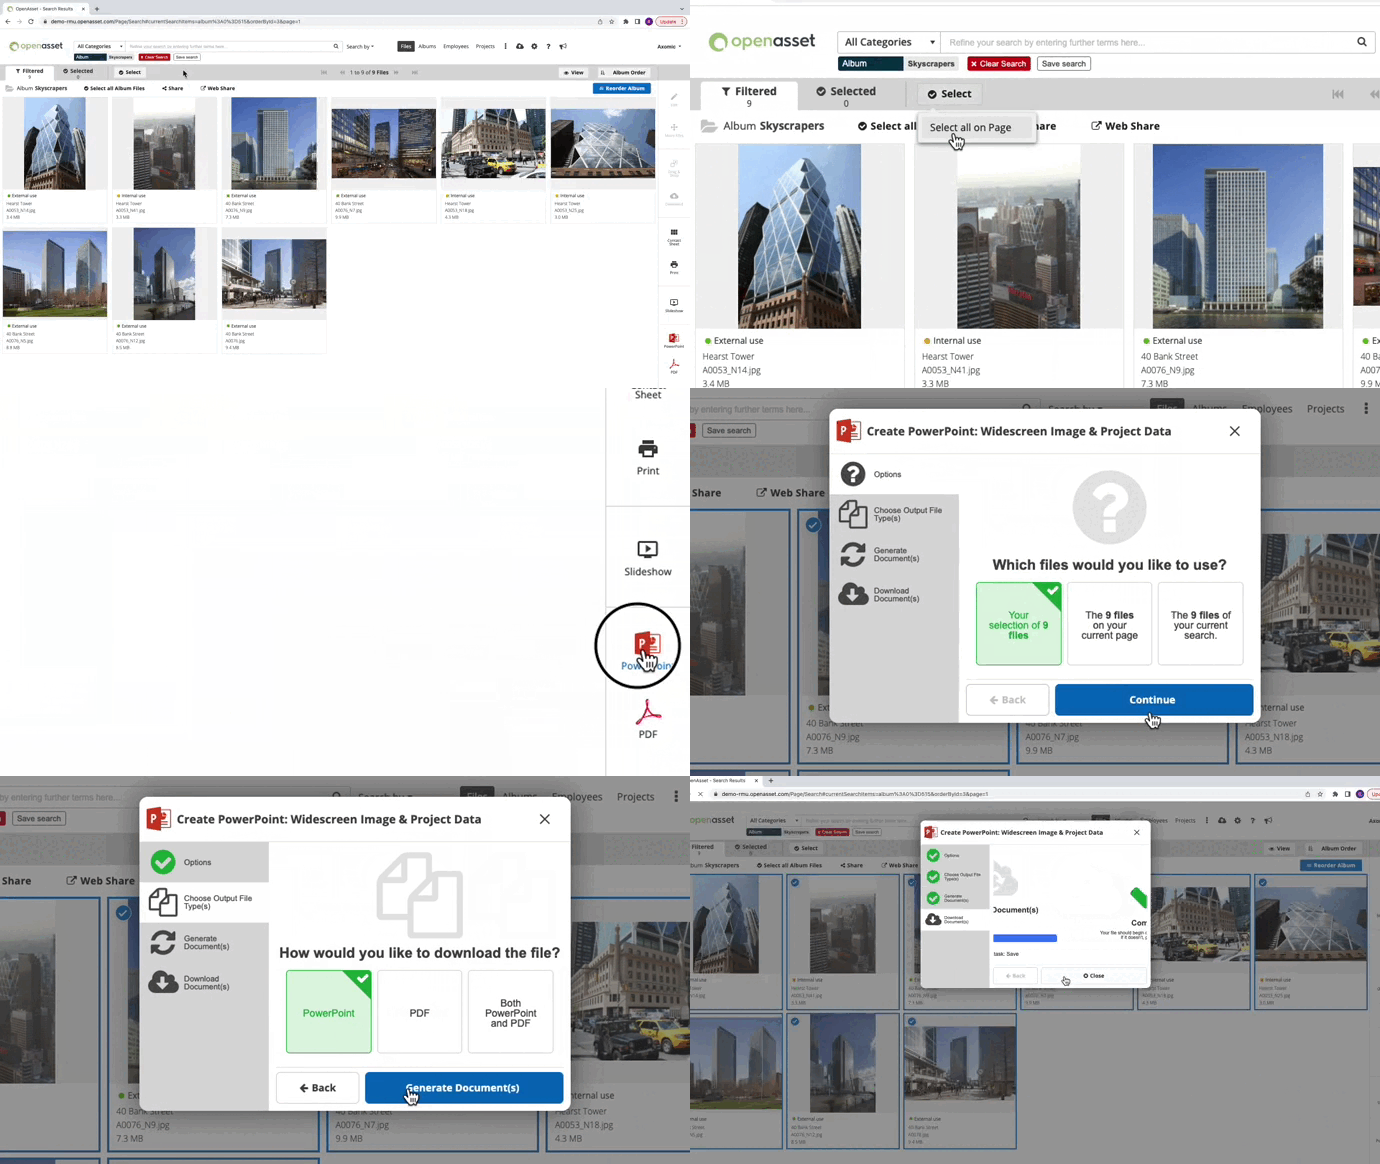
You can learn more about the self-serve template creator here.
Alternatively, custom templates can be created with the help of OpenAsset’s support team. This is a more involved process where you would send us a spec version of the document, and our support team will create a script that mirrors the example. These templates can be highly customized, allowing for the placement of images and text in different frames and with each slide having its own dedicated format. Your firm may have an existing template in your system, but unlike the self-serve creator, additional custom templates are a paid feature.
Getting Started
While some scenarios might require a beautiful deck, for others all you might need is a simple yet stylish overview of your work. With Slideshows, Project Overviews, and Map Views there are a wide variety of ways to do this within OpenAsset. Meanwhile, our Powerpoint compatibility offers a further option to present your work.
To learn more about showcasing your images, feel free to reach out to your dedicated Customer Success Manager, or reach out to our support team, here. After all, your beautiful project images are not made to be hidden!


